Smart Slots can plan by your team's capacity as well as by free docks. You describe how many people each kind of load needs, and the shifts you have; YARDtwin then marks each slot by the labour pressure it would cause, and can refuse slots your team can't handle.
You switch it on in four stages, so you can fill in the data before carriers notice anything.
Choose the stage
Open Site Admin, click Smart Slots, and scroll to Smart Slots — Labor Management.
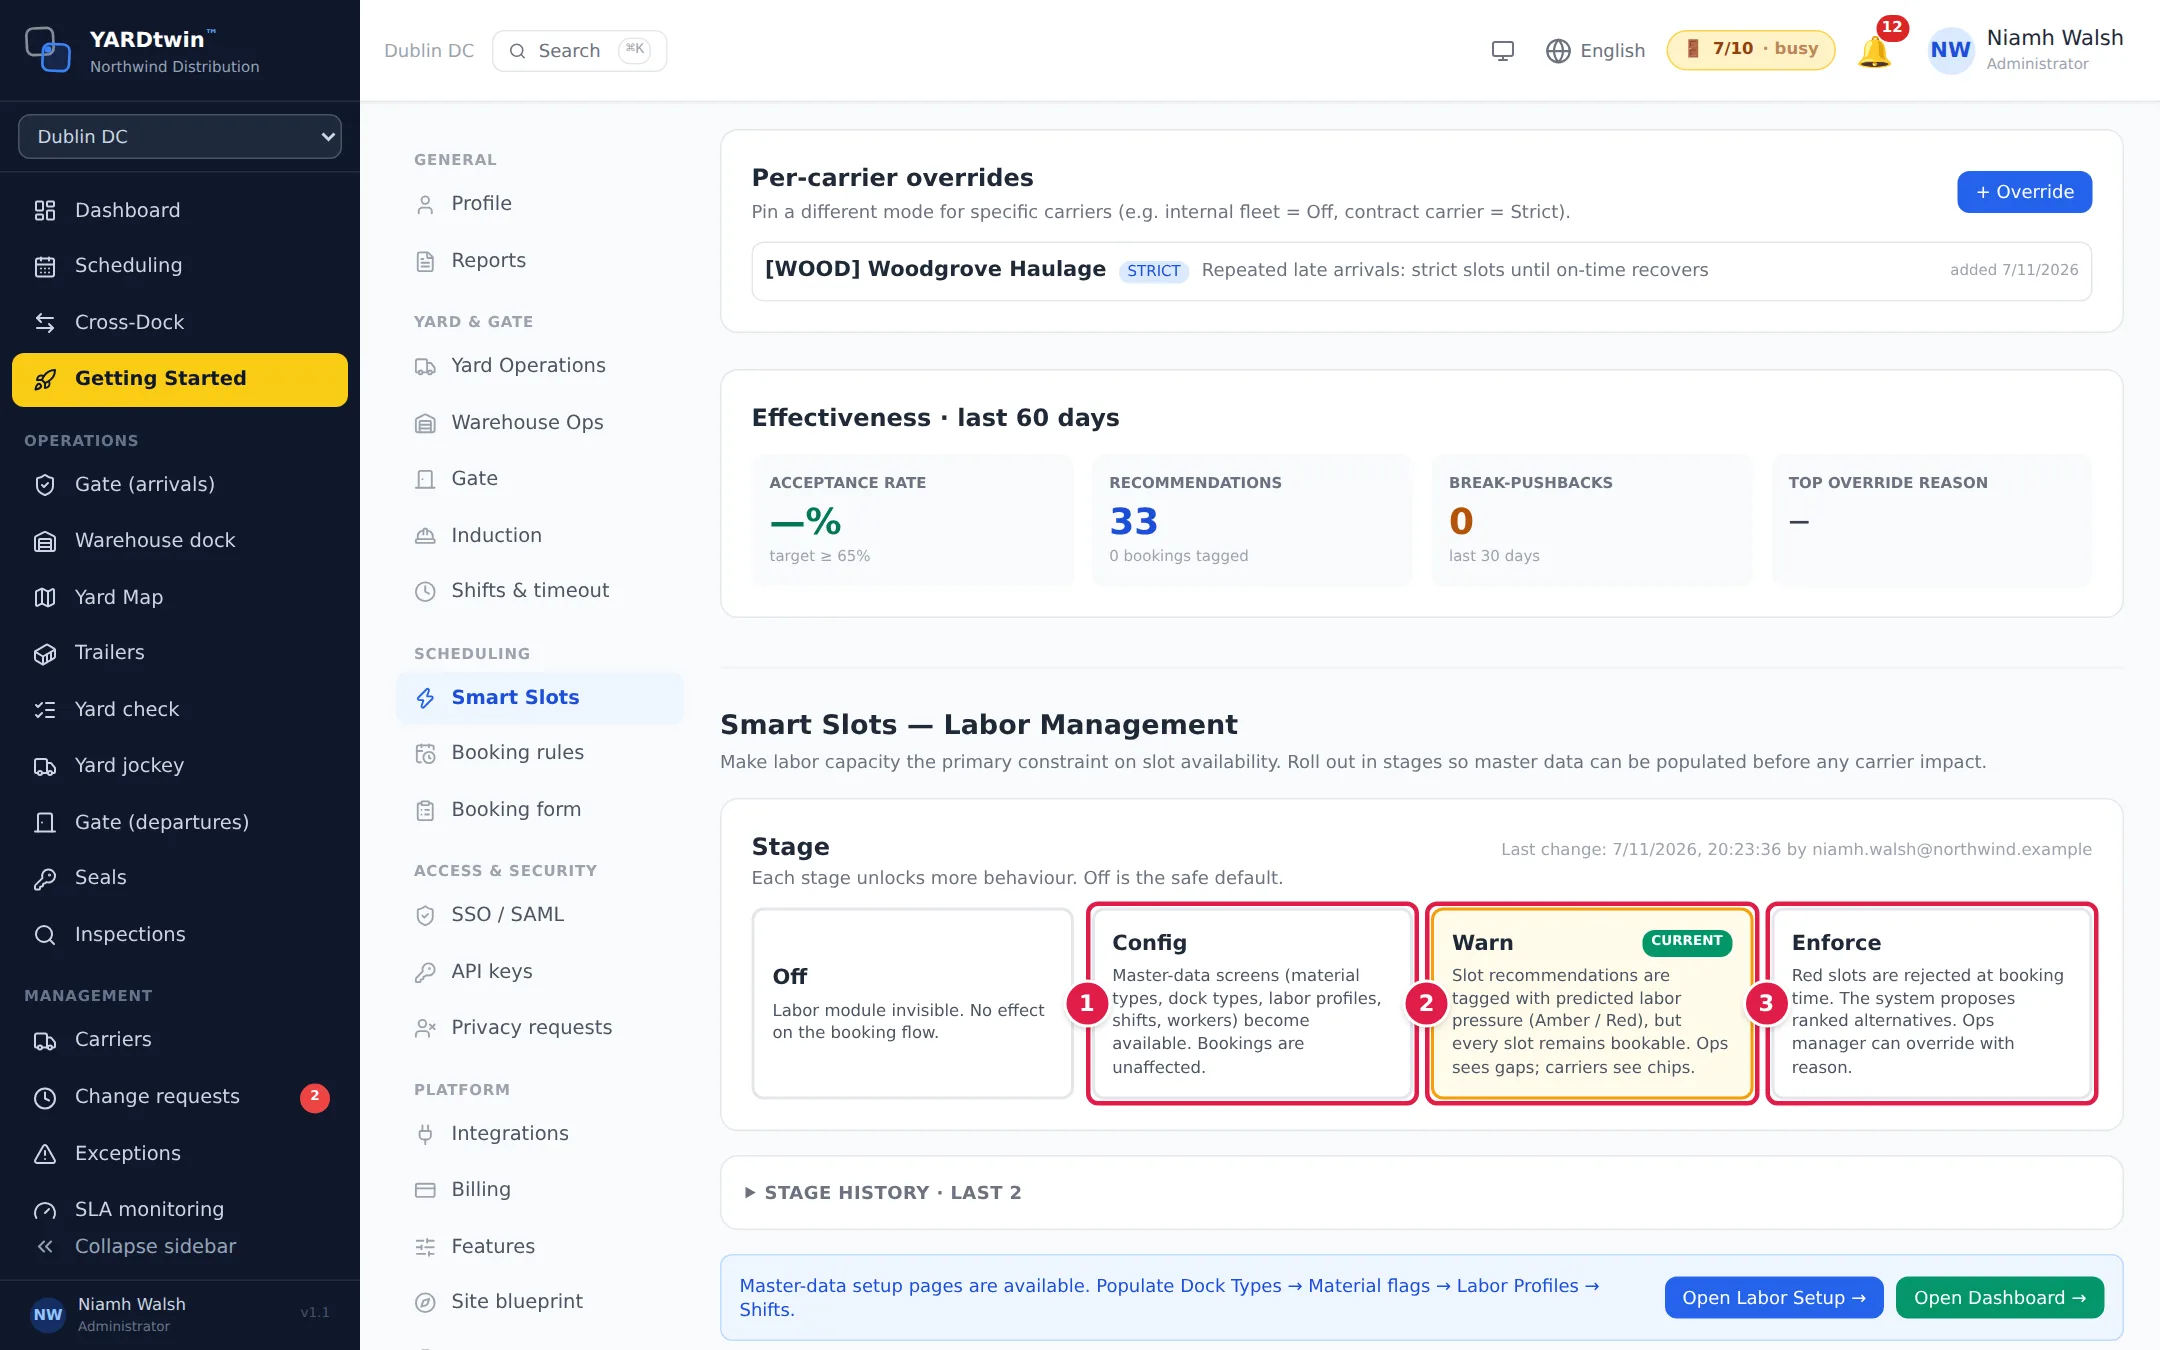
Off is the starting point: nothing changes. Click a stage to move to it:
- Config: the labour set-up pages become available. Bookings aren't affected.
- Warn: slot recommendations are tagged with the predicted pressure, amber or red, but every slot can still be booked. Your team sees the gaps and carriers see the colours.
- Enforce: red slots are refused when booking, and YARDtwin offers the best alternatives instead. An admin or ops manager can override with a reason: the booking form lists the red slots to them under Over labour capacity (override needed), and a refused booking offers Book anyway — reason. See Pick a slot with Smart Slots.
YARDtwin asks you to confirm before switching to or from Enforce. Ops managers can move a site forward a stage but not back; ask an administrator to step back. Stage history lists every change and who made it.
Fill in the labour set-up
Once the stage is Config or later, click Open Labor Setup → under the stages.
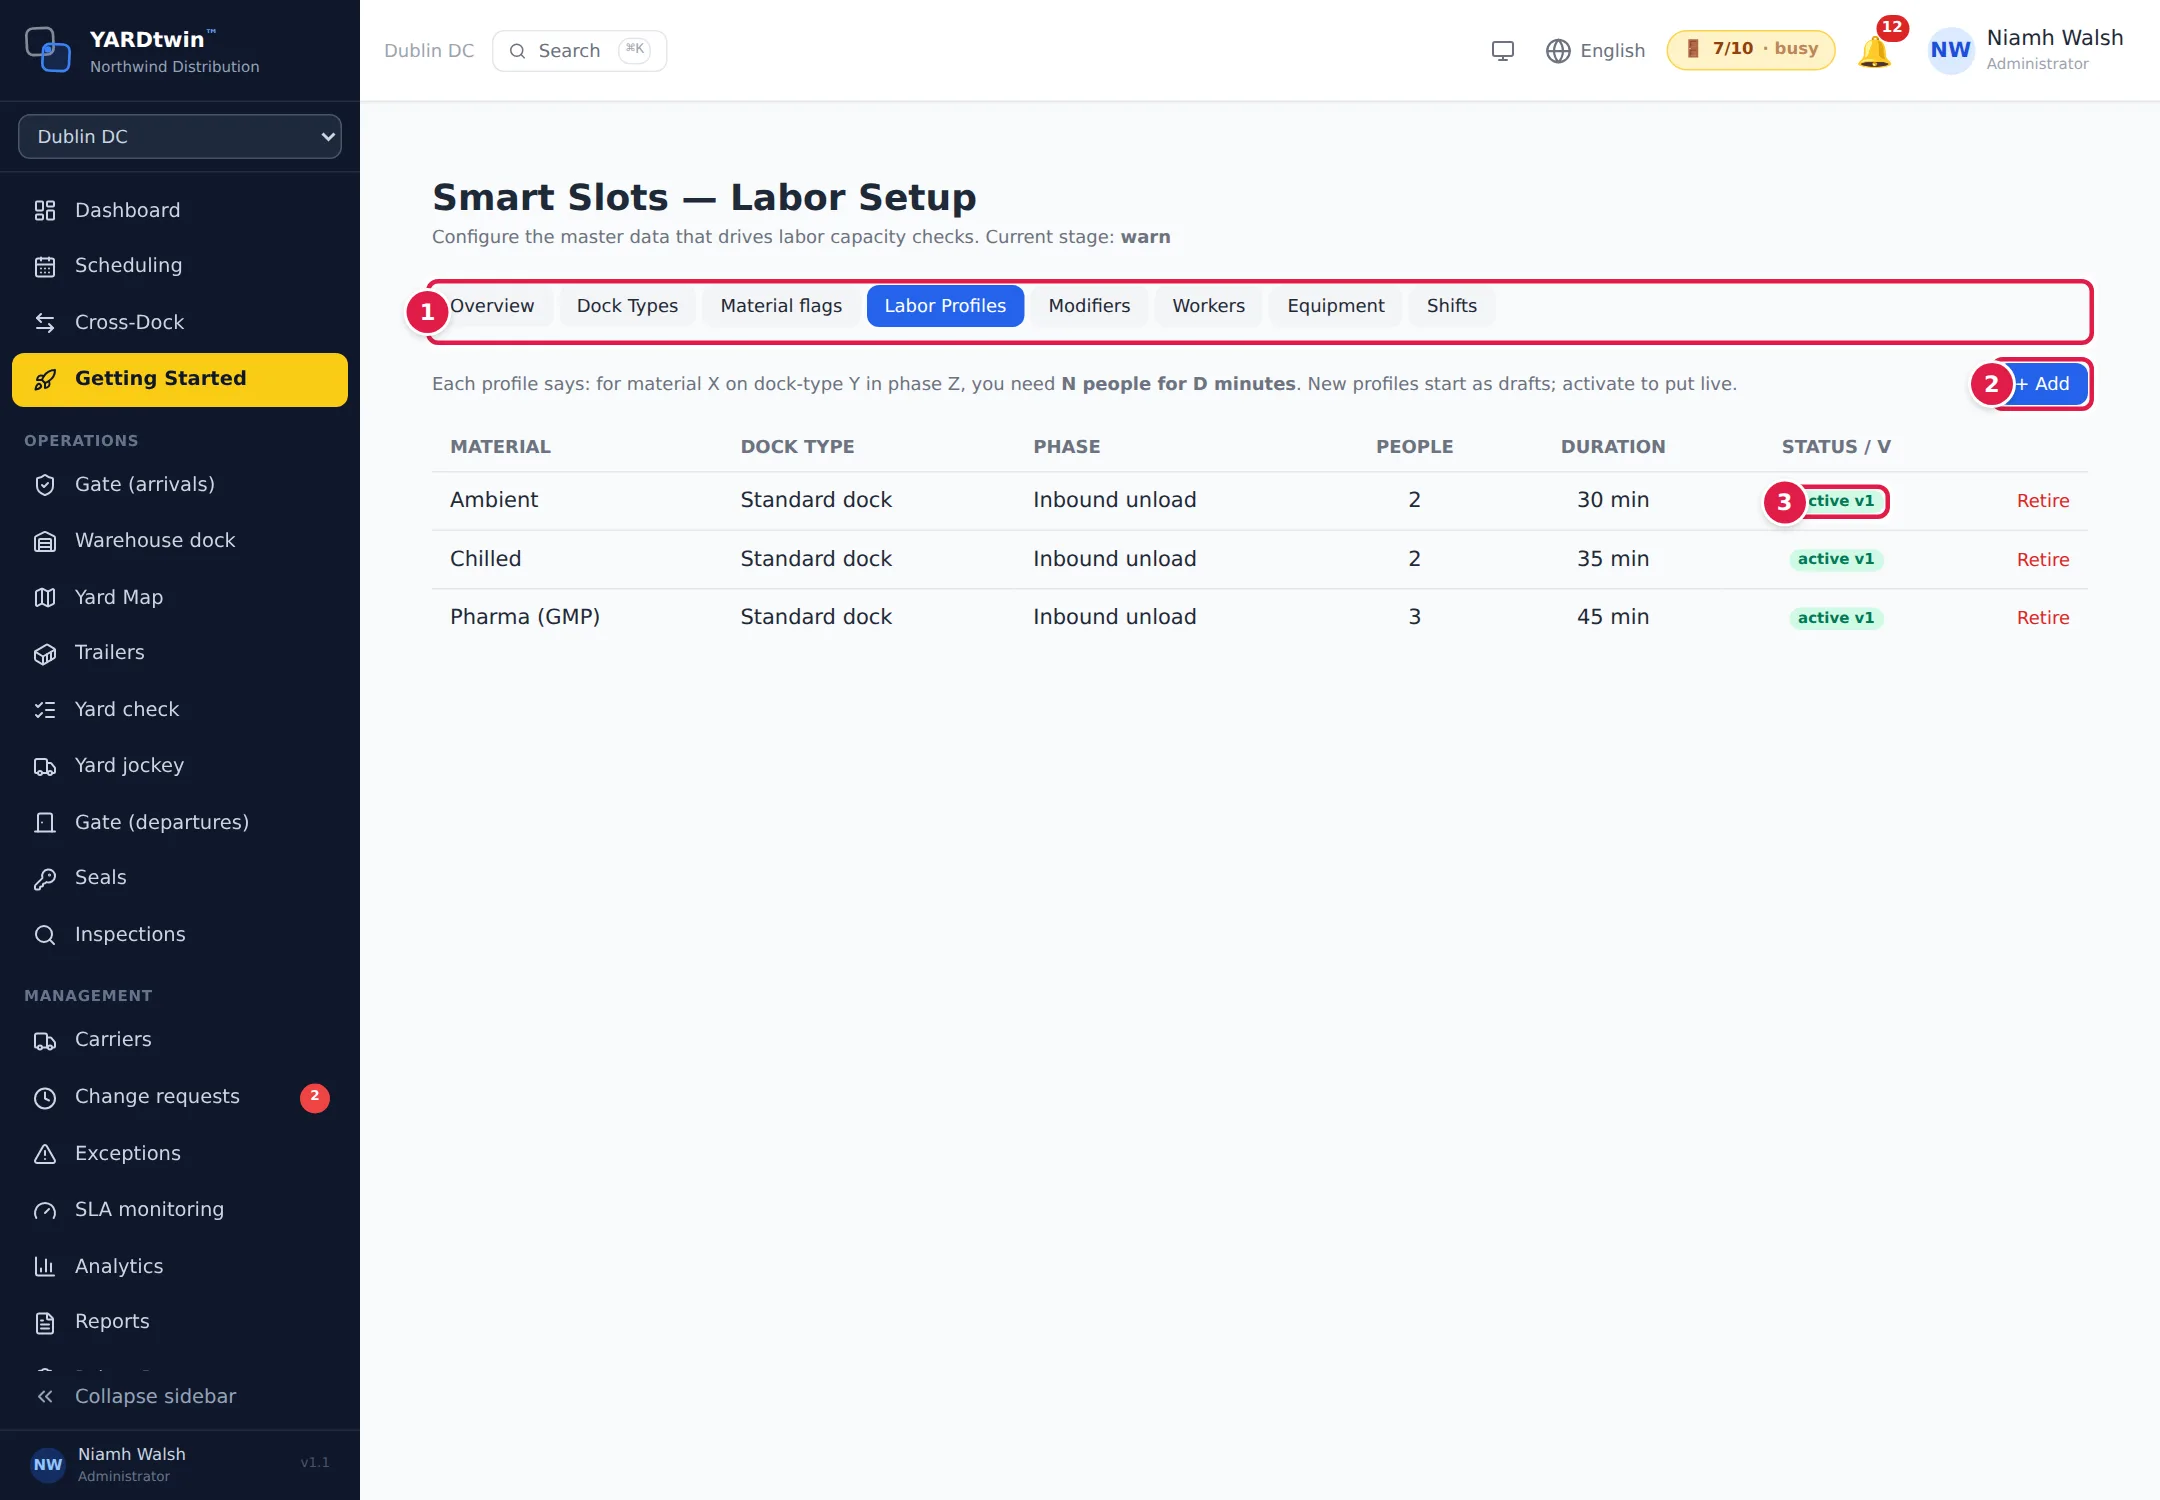
- Sections. Click one to open it. They are described in the table below.
- + Add adds an entry to the open section, here a new labour profile.
- Status. A profile is draft until you click Activate, then active, with its version (v1, v2…). Retire takes an active profile out of use.
The sections:
| Section | What you enter |
|---|---|
| Overview | A readiness check. The minimum for Warn is at least one dock type, one active labour profile and one shift in the next 14 days. |
| Dock Types | Classify your docks, for example Standard, ATEX or Cold-chain, with a complexity factor. |
| Material flags | Labour-relevant flags for each material type, such as hazmat or controlled goods. |
| Labor Profiles | For each material, dock type and phase (for example unloading inbound): how many people for how many minutes. New profiles start as drafts; click Activate to use one. |
| Modifiers | Adjustments at booking time, such as one extra person for hazmat goods, or longer times on a late shift. |
| Workers | Optional. Named people and their skills, for matching skills to work. Leave it empty to plan by headcount only. |
| Equipment | How many forklifts, reach trucks and other machines you have. A slot is blocked when a machine it needs is fully booked. |
| Shifts | Your shifts, with the planned headcount. |
Work through them in this order: dock types, material flags, labour profiles, then shifts. Only administrators can change the set-up, except Shifts, which ops managers can also edit.
If the stage is still Off, the page says Labor module is off for this site.
Read the labour dashboard
From Warn onwards, click Open Dashboard → next to Open Labor Setup →.
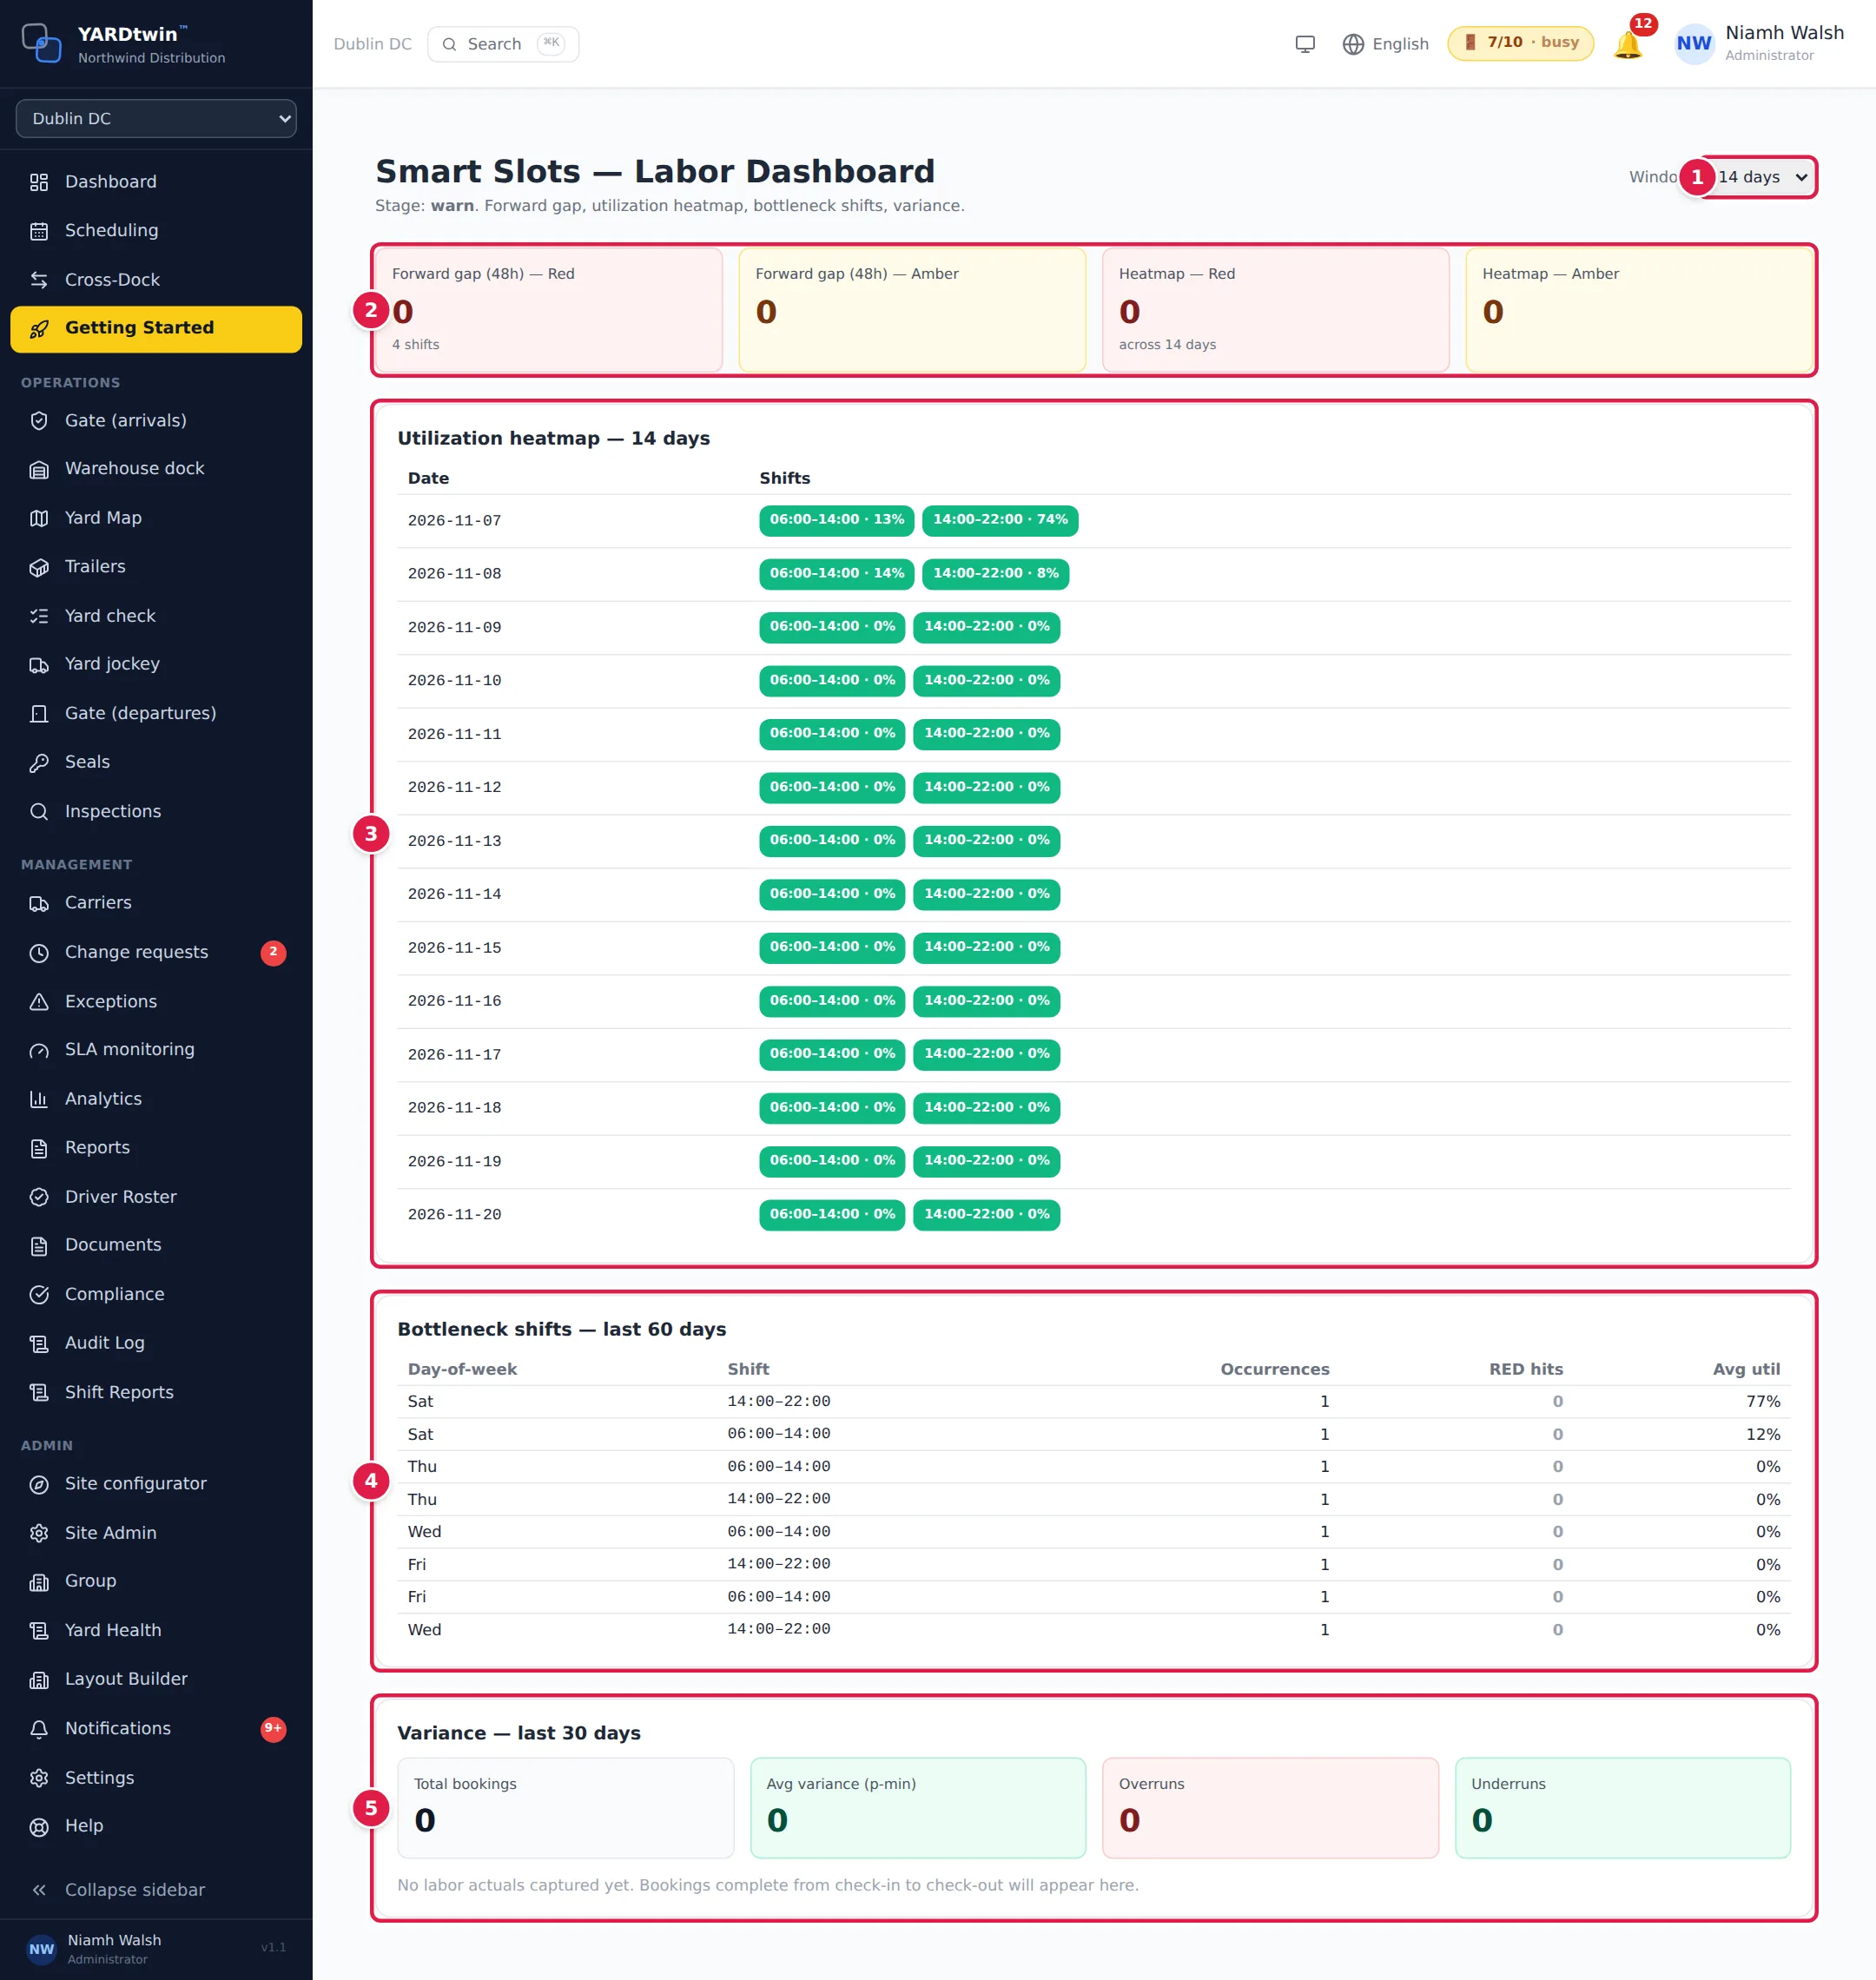
- Window: how many days ahead the heatmap covers: 7, 14, 21 or 28.
- Forward gap (48h) and Heatmap totals: how many shifts are red or amber, in the next two days and across the window.
- Utilization heatmap: each day's shifts, with how much of the shift's labour is already booked. Green is fine; amber and red show pressure.
- Bottleneck shifts — last 60 days: for each day of the week and shift, how often it ran, how many times it hit red, and its average use.
- Variance — last 30 days: predicted labour against what loads actually took, by material and phase, with the number of overruns and underruns. Use it to correct your labour profiles. It fills in as bookings are completed from check-in to check-out.
Before Warn, the dashboard says Dashboard unlocks at stage Warn or later.
Stay on Warn for a few weeks before you switch to Enforce. If the variance shows your profiles are off, adjust them first; if Enforce starts refusing loads you can handle, drop back to Warn.